Family Archivist: Digitizing Photos/Videos
Intro
Two years ago that I embarked on a personal and somewhat daunting mission: to digitally archive my family’s precious memories from the clutches of physical photographs and aging videotapes. My mom and grandma had amassed a trove of moments captured on film/printed photographs, on VHS, Hi8, and even those old MiniDV tapes I vaguely remembered from childhood that needed a special VHS adapter to play.
These weren’t just snapshots and recordings; they were tangible links to our past, echoing with laughter, marking significant milestones, and capturing the everyday moments that knit our family together. Over time, our family has geographically dispersed across the country, making it a shame that a single precious photograph or home movie might reside in one location while so many of us no longer do. The videos, in particular, hold a special significance for many of us. They offer a snapshot into homes that no longer exist and allow us to hear the voices and see the smiles of family members who have passed on. It’s a poignant experience – literally, as I write this blog post, I’m listening to my grandfather’s voice narrate some footage of an approaching storm during a vacation in Maine back in 2002.
As I began this project, the sheer volume of material was… well, let’s just say it was enough to fill several boxes. Stacks of photo albums, and piles of tapes labeled with cryptic dates and barely legible handwriting – it was a beautiful mess.
The decision to digitize everything wasn’t taken lightly. I knew it would be a time-consuming process, potentially filled with technical hurdles. But the thought of these irreplaceable memories degrading further, the colors fading and the tapes becoming unplayable for one reason or another, spurred me on. I envisioned a digital archive, a safe haven where these moments could be preserved, easily shared with family, and enjoyed for generations to come.
As I near the finish line of this project, I thought I would document just “how” I did this in case it helps anyone else facing a similar situation.
Storage
The first crucial step is deciding where and how to store your digitized photos and videos. A reliable external hard drive is an excellent starting point, providing a tangible backup right at your fingertips. I used a 5TB WD drive as a “temporary” solution while doing the initial conversion process.
However, for true peace of mind and the added benefit of accessibility and redundancy, consider leveraging a cloud storage provider. Services like Google Drive (my personal preference), Microsoft OneDrive, Dropbox, or other cloud storage provider offer a secure and convenient way to safely store your digital archive.
The beauty of cloud storage lies in its inherent redundancy; your files are typically stored across multiple servers in different locations, significantly reducing the risk of data loss due to hardware failure or other unforeseen events. Furthermore, these platforms make it incredibly easy to share your digitized photos and videos with family members, regardless of where they are in the world, fostering connection and allowing everyone to relive those cherished moments together. The only down side of this is that depending on how much material you have, you may have to pay for additional cloud storage.
If you are shy about cloud, you can also copy your archive over to redundant external hard drives and mail them out to family. Having multiple copies like this in existence should help reduce any fatal digital losses.
Photos
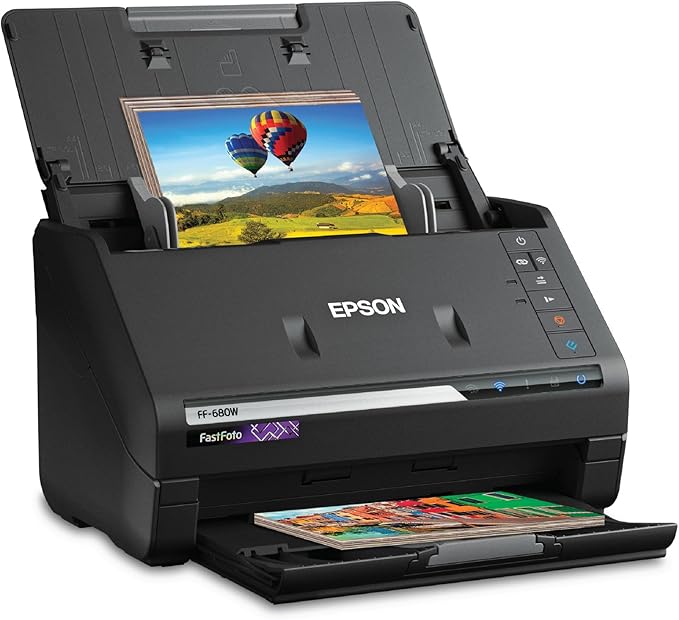
Photos is where I started, since they are generally fairly “easy” to do, even when you have thousands. I personally picked up a Epson FastFoto FF-680W. This scanner is awesome because it’s really easy to use, and is kind of a workhorse when it comes to volume.
It’s specifically made to scan 4x6 -> 8x10 photos or documents really quickly. There’s not a ton of “advice” to give here other than make sure you keep track of what you have scanned, and rename and properly categorize the photos as they are scanned into folders that make sense to you. Also, the scanner software ran a lot better on my PC than it did on my Mac, just a weird note.

Videos
There’s certainly multiple ways to do video conversion, so take this method as “one” way. I think it works well though so there’s that.
To start, you need some hardware. A quality VHS player, something to convert the analog signal of VHS to digital, and you need to get that digital signal over to your PC.
For me, I did this with four primary pieces of hardware:
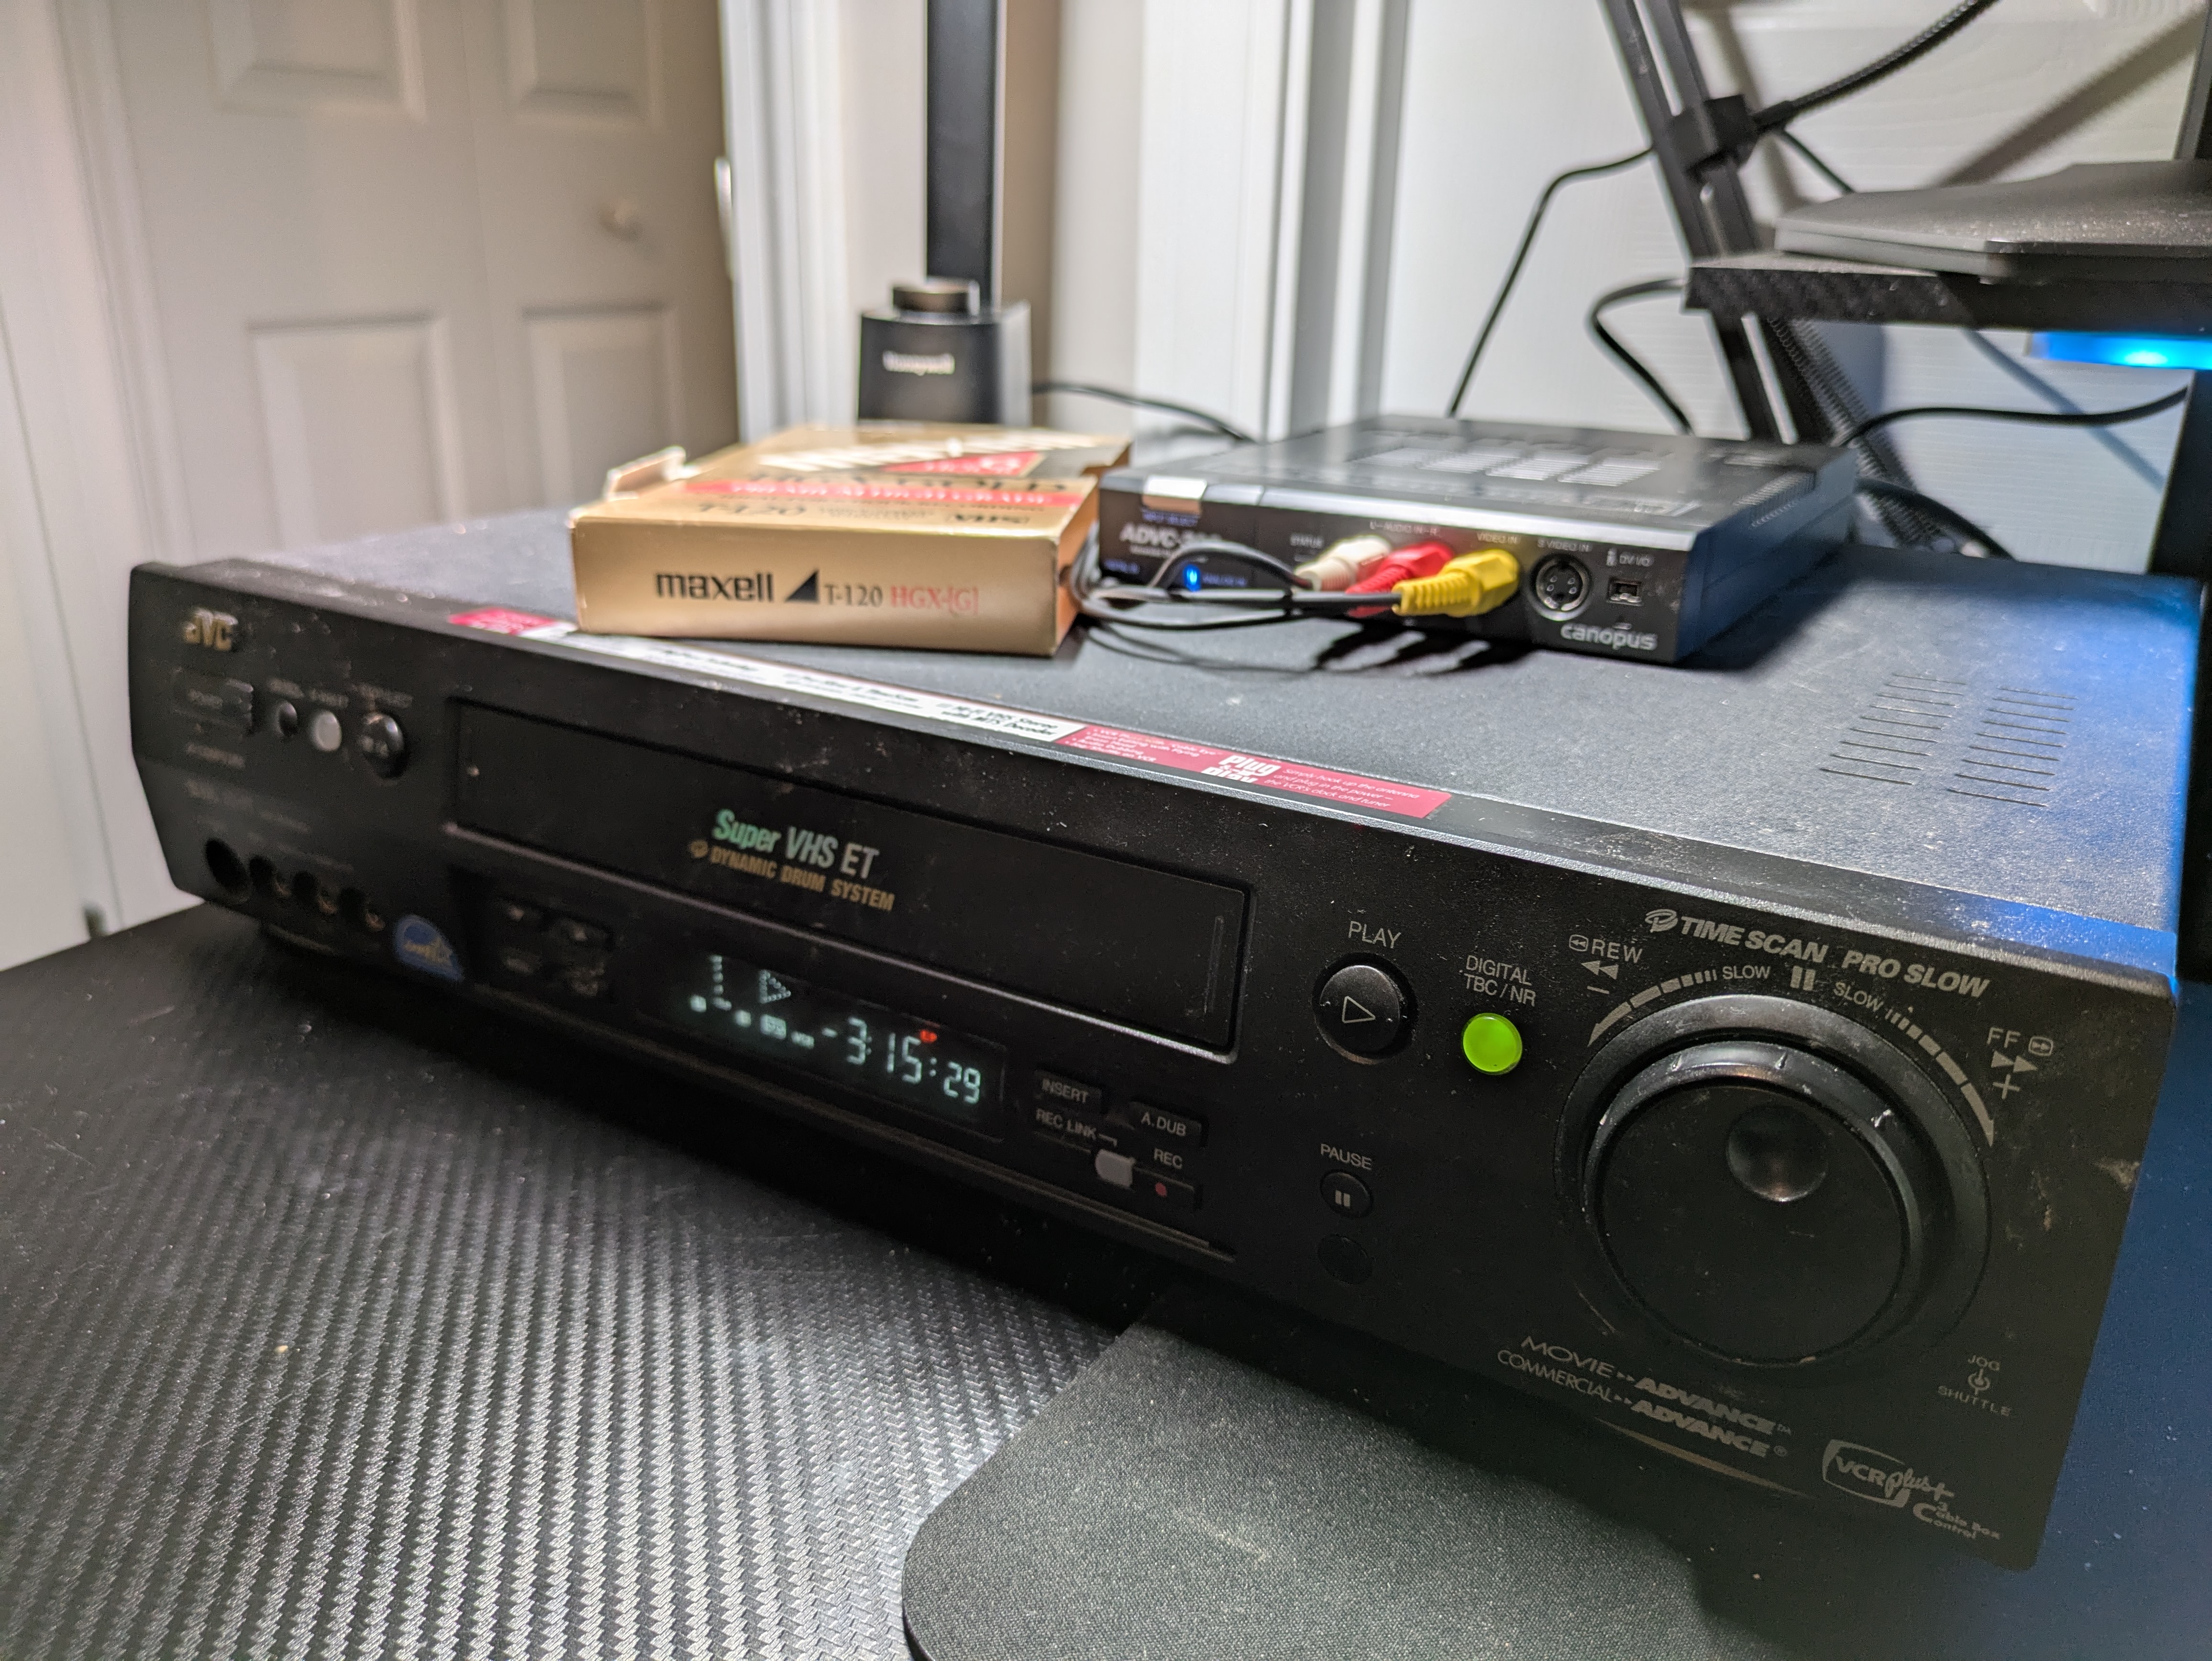
- JVC S7600U VHS Player
- JVC C-P6U Cassette Adapter
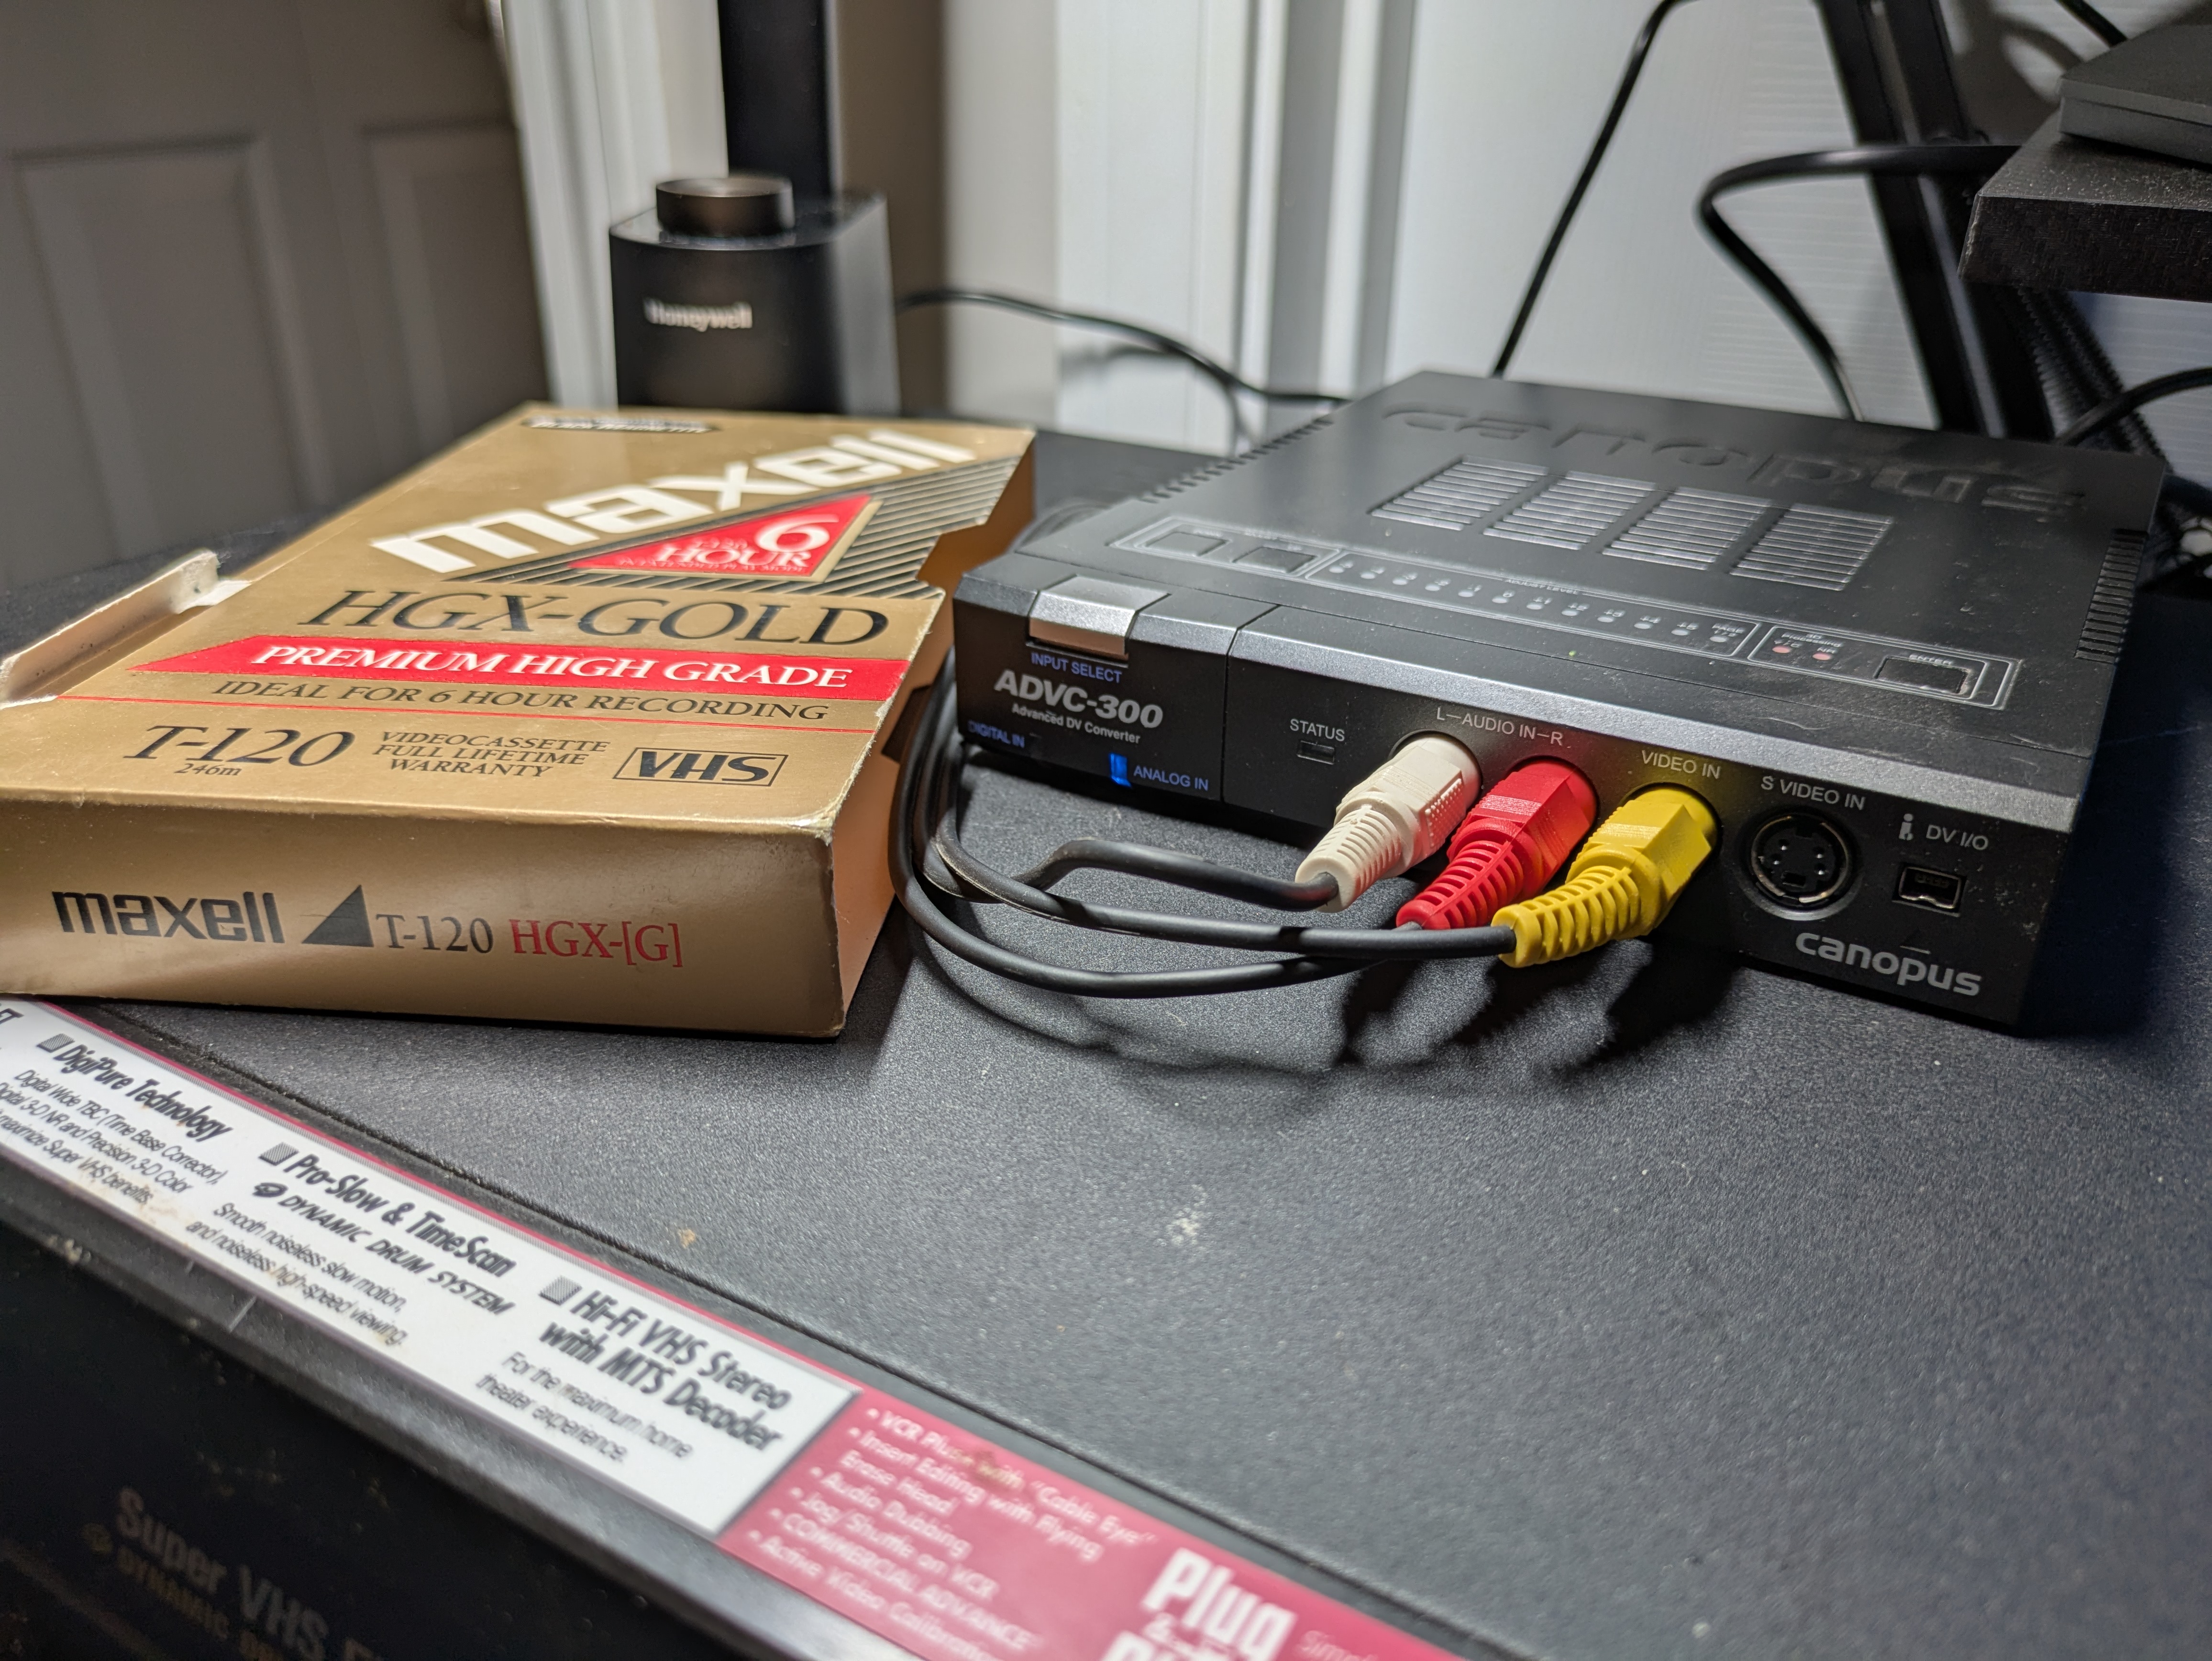
- Canopus ADVC-300
- A StarTech PCIE FireWire Card
The setup is somewhat straight forward - you install the firewire card into your PCIE slot on your computer and search high and low on the internet for the legacy 1394a drivers. Run a FireWire cable from your freshly installed FireWire card to the back of the ADVC. Next, plug in the VHS composite A/V cables from the back “output” ports to the front “input” ports on the the ADVC … that’s it. Use the Adapter when you have the mini cassettes and not a full sized VHS tape.


The joy of all this?
Outside of the FireWire card which you might be able to find on Amazon for $30 or so; 100% of this will need to be found on eBay because none of these things are actually produced anymore. You will probably spend at least $300 - $500 on a “good” VHS player with TBC, $150 on the ADVC-300, and another $30 on the adapter. You can try out a cheaper VHS player, but your results may vary.
I don’t personally have one, but a small CRT TV with composite A/V in can be useful for troubleshooting (eg. making sure all your VHS stuff actually runs/works without software on your computer working).
Given the price, I’ve seen quotes where people digitize a single VHS for $20 - $50 per tape…so if you have 10 tapes it might be worth just paying someone else to do all this for you. Unless you’re in my shoes, and you have 50+ tapes to do in which case this DIY option is the cheaper option (albeit more labor intensive!)
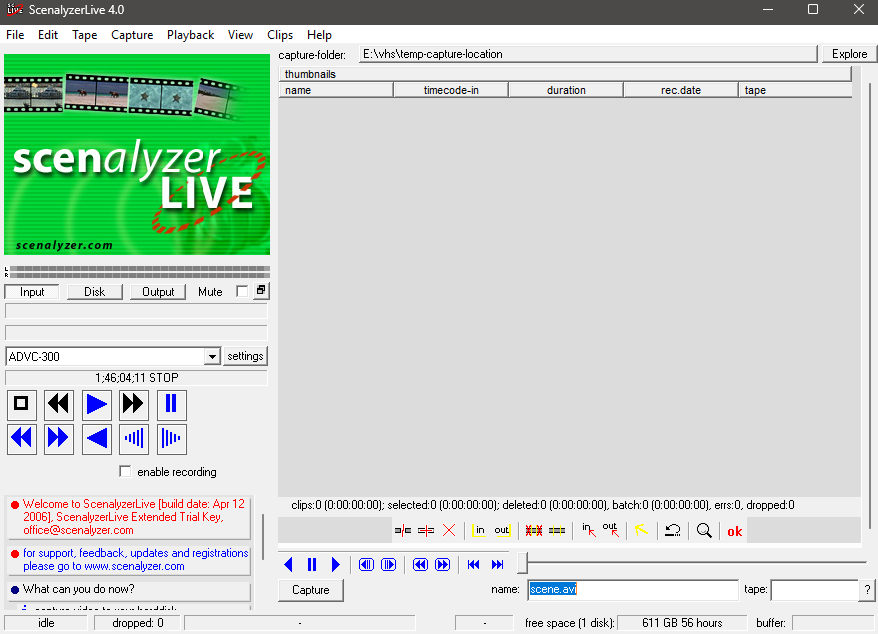
Once you have all that setup you have to go get some decade+ old discontinued software known as ScenalyzerLive this should come with a license key and the manual. There may be other software out there to work with this hardware setup, but this is what I found that worked for me (even on Windows 11!)

Point this software at a capture folder, and go to the top to select “Capture” and start playing your VHS either via the VHR itself or via the play button. You should have your Input set to “ADVC-300” which will only be detected if your FireWire card/drivers are configured correctly.
Once you’re done capturing a file prepare to be annoyed by the massive AVI video format. If you don’t mind the file size, let it be. But for me, I kept the AVI copies on a local disk and used HandBrake/VLC/ffmpeg (whatever) to convert the AVI to mp4 w/ H.264 encoding before uploading it to the cloud to save on cloud storage costs.
After that you should be good to go…
Unless you have a ton of HI8 8mm cassettes, in which case you may need to buy a functional Sony DCR-TRV730 or 740 and an S-Video cable to convert those over; refer to this Reddit DataHoarder Tutorial.
Of course, if you happen to have some family DVD’s laying around from the mid 2000s then you can rip those really easily with VLC or handbrake. No tutorial, special equipment, or weird drivers necessary.
and…that’s it?
Good Luck. Have Fun!
